Overview
Virtual machines (VMs) are the primary compute resource in GPCN™. Each VM provides a dedicated server with full root access, running on isolated hardware in one of GPCN™'s global data centers. VMs can be used for a wide range of workloads, including web applications, databases, machine learning pipelines, and development environments.
When creating a VM, you select the data center, operating system, and hardware configuration. The system then provisions the VM automatically, typically within a few minutes.
Actions
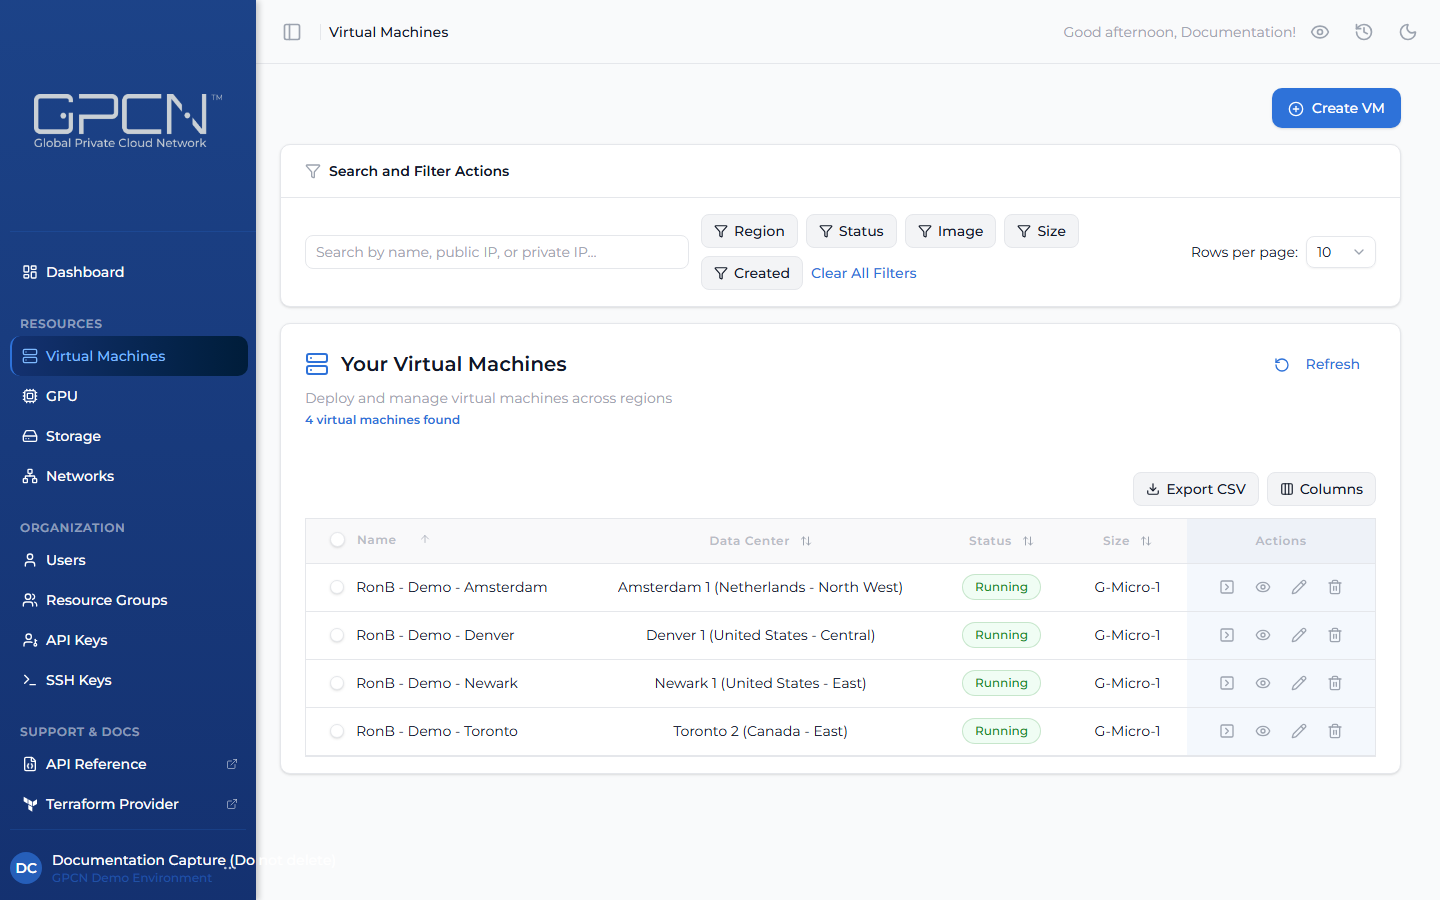
Each VM row in the list exposes a set of inline actions:
- Launch Console — open a browser-based console session directly to the VM
- View Details — open the VM's detail page to see configuration, networking, storage, and status
- Edit — modify the VM's name or resource group assignment
- Delete — permanently remove the VM and release its resources
Key Concepts
Data Centers
Every VM is deployed to a specific data center. Each data center has its own set of available images and configuration sizes. You choose the data center when creating a VM.
Images
An image is the operating system template used to provision your VM. Available images vary by data center and include Linux distributions (Ubuntu, Debian, AlmaLinux, Rocky Linux) and Windows Server editions. See Available Images for the full list.
Your organization can also have custom images and ISOs of its own. See Images and Media for how to review and manage them.
Configuration Sizes
VM sizes are organized by category (General Purpose, Memory Optimized) and tier (Micro, Small, Medium, Large). Within each tier, you choose a specific CPU, RAM, and disk configuration.
You can upgrade a running VM to a larger configuration within compatible tiers. See Available Sizes for the full catalog.
VM Lifecycle
VMs transition through these states:
| State | Description |
|---|---|
| Starting | VM is booting up |
| Running | VM is active and accessible |
| Stopping | Graceful shutdown in progress |
| Stopped | VM is powered off but preserves disk and configuration |
| Shutoff | VM was shut down from inside the guest OS |
| Rescue | VM is booted into a rescue image for repair or recovery — see Rescue Mode |
| Error | VM encountered an error and requires attention |
Credentials
When creating a VM, you choose how to authenticate:
- SSH Key (recommended) — select a key from your SSH Keys library. The public key is injected into the VM at boot via cloud-init. Connect using the matching private key.
- Password — set a password for SSH or console access. GPCN™ can auto-generate a strong one, or you can specify your own. Copy it before deploying — it won't be shown again.
Windows VMs and some network/security appliances don't support cloud-init and use password authentication only. For those images, initial credential setup may need to be completed through the GPCN™ console at first boot.
You can update the SSH key associated with a VM at any time from the VM's detail page. See SSH Keys for help managing your key library.
GPCN™ does not store VM credentials. Passwords are shown once at deployment and never again. Private keys are shown once at generation and never stored. Store your credentials securely — in a password manager, secrets vault, or key management system — before closing the deployment screen.
Storage
Each VM includes a boot disk sized to its configuration. You can attach up to five additional storage volumes to a running VM for extra capacity. See the Storage documentation for details.
Networking
Each VM has at least one network interface connected to a private network. You can attach up to five interfaces in total, allocate public IPs, and configure networking after creation. See Network Interfaces for details.
Export
Click Export CSV from the VM list to download the current view as a CSV file. The export includes only the rows currently visible after filtering — and only the columns you have enabled via the Columns selector. The file is saved as virtual-machines-{date}.csv.
Next Steps
- Create a VM — deploy your first virtual machine
- Manage VMs — start, stop, upgrade, and delete
- Console Access — connect via the browser console
- Rescue Mode — recover a VM that won't boot
- Images and Media — manage custom images and ISOs
- Bulk Operations — manage multiple VMs at once
.png)