Rescue Mode
Rescue Mode boots a virtual machine into a controlled alternate environment, giving you direct, offline access to its disks for repair, maintenance, recovery, and migration work.
What Rescue Mode Does
Rescue Mode starts a VM from a separate rescue image instead of its primary disk. That primary disk is not booted as the operating system, so it stays available for you to inspect, mount, and modify directly.
This provides administrators with an isolated workspace independent of the installed operating system. Because the primary system is offline, you can safely perform maintenance and recovery tasks without active services, open file locks, or in-use files interfering with changes.
Rescue Mode supports a wide range of operational and administrative workflows, including:
- Filesystem repair — check and repair filesystems that cannot be serviced while mounted
- Backup and recovery — copy data before risky changes or restore files from a known-good state
- Data migration — move data between disks or migrate data off the VM entirely
- Offline maintenance — apply changes that require the installed OS to remain stopped
- Configuration repair — fix bootloader issues, invalid
/etc/fstabentries, network configuration problems, or other startup blockers - Disk inspection — review partitions, logs, and system files without booting the installed OS
- Password resets — regain access by resetting local account credentials directly on the filesystem
- Manual recovery operations — remove problematic files or roll back failed changes
- Third-party tooling — boot recovery, backup, forensic, or migration ISOs and run specialized tools against attached disks
Rescue Mode itself is non-destructive. Entering or exiting Rescue Mode changes only the VM's boot source and does not modify data on attached disks unless you explicitly make changes from within the rescue environment.
How It Works
Every rescue session follows the same flow:
- Start Rescue Mode on the VM and select a rescue ISO.
- The VM reboots into the rescue environment.
- Connect through the VM console and do your work.
- Exit Rescue Mode when you're finished.
- The VM reboots from its primary disk and returns to normal operation.
Prerequisites
- The Tenant Administrator or Tenant Power User role
- The virtual machine you intend to service
Enter Rescue Mode
You can start Rescue Mode from either the VM's detail page or the console. Both routes open the same rescue dialog.
- Open the rescue dialog:
- From the VM detail page — click Rescue.
- From the console — click the wrench icon in the action bar.
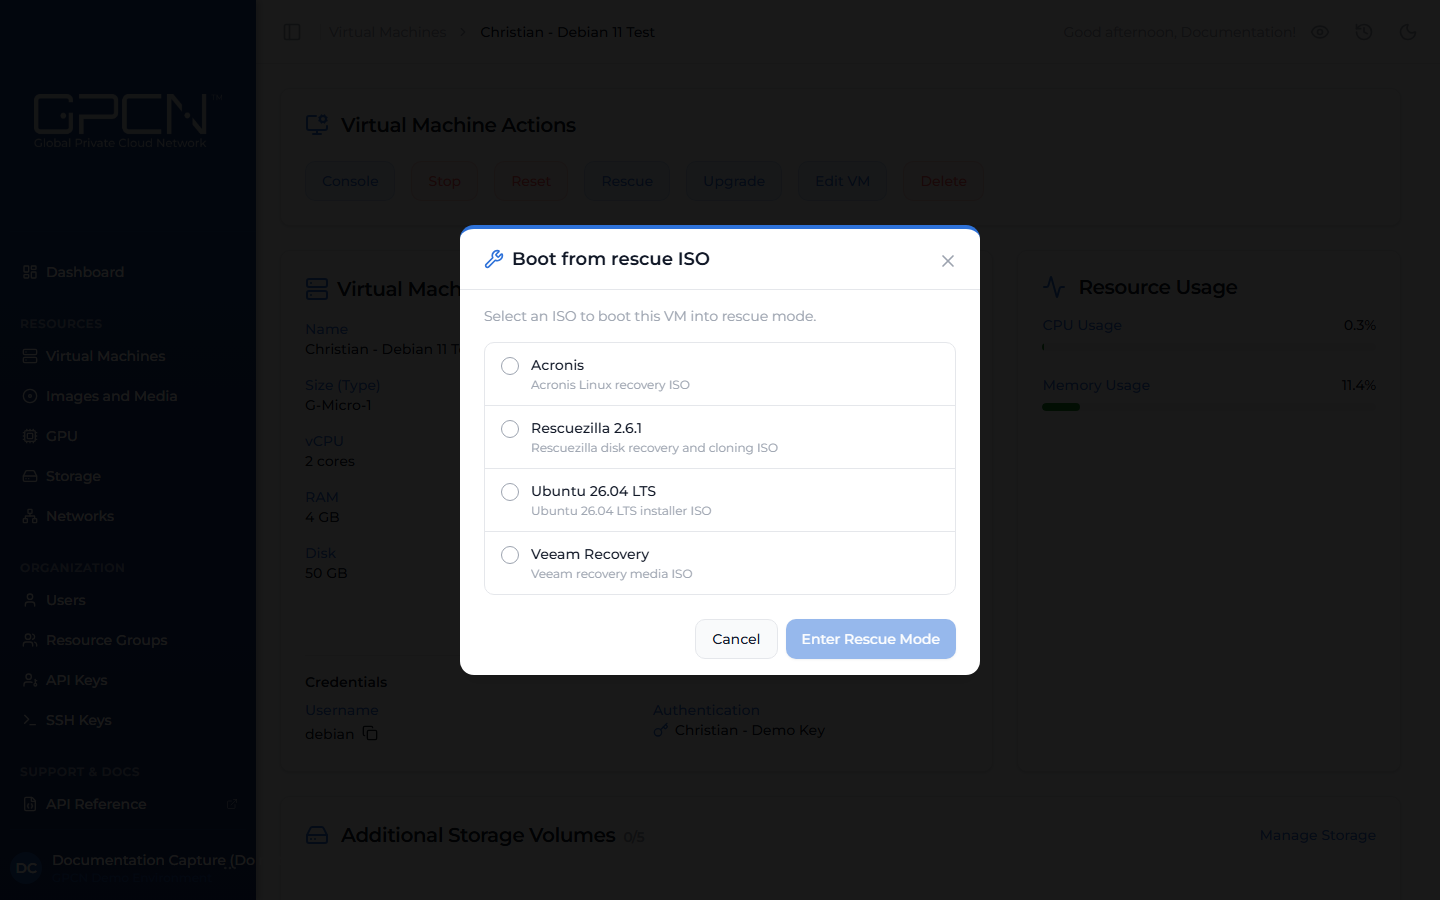
- In the rescue dialog, select a rescue ISO. The list shows ISO images available in the VM's data center — search by name to narrow it down.
- Click Enter Rescue Mode.
The VM reboots from the selected ISO. Progress is tracked as a job in the task drawer, and you can follow the boot from the console.
Working in the Rescue Environment
You interact with the rescue environment through the VM console. The console gives you a direct session into the running rescue image, where you can mount the primary disk and run your tools. Storage volumes attached to the VM aren't presented while it's in Rescue Mode — the rescue environment works with the primary disk only, and your additional volumes become available again once you exit Rescue Mode.
Changes you make to the primary disk in Rescue Mode take effect immediately and permanently. There's no separate confirmation step — treat it as live, and back up important data before making changes.
Restricted Actions
Rescue Mode is a temporary, deliberate state, so the portal pauses actions that are meant for a VM running its normal operating system. This protects your repair session — it keeps your work from being interrupted and prevents changes from being applied to a VM that isn't in its usual state.
These actions are unavailable until you exit Rescue Mode:
- Power controls (start, stop, reset) — restarting or stopping the VM would end your rescue session unexpectedly and could interrupt work in progress. To leave Rescue Mode safely, use Exit Rescue instead.
- Upgrades and configuration changes — these involve a reboot and apply to the installed operating system, so they're best done once the VM is back to normal operation.
- Network interface changes — adding or removing networks is intended for the VM's normal operating system, which isn't running during a rescue session.
- Adding storage — you can't attach additional storage volumes while the VM is in Rescue Mode, since volumes are used by its normal operating system rather than the rescue environment.
You get all of these back the moment you exit Rescue Mode. The console stays available the whole time, so you always have a way to do your work, and the VM's status shows as Rescue until the session ends.
Exit Rescue Mode
- On the VM's detail page, click Exit Rescue. From the console, click the wrench icon again.
- Confirm in the Exit Rescue Mode? dialog.
The VM exits Rescue Mode and reboots from its primary disk, which may take a few minutes. Exiting is tracked as a job in the task drawer. When it completes, the VM returns to its normal Running state.
Rescue Images
GPCN™ (Global Private Cloud Network™) doesn't provide default rescue boot disks. In Rescue Mode, a VM boots from a rescue ISO that your organization supplies and loads into its environment — this gives you full control over the recovery toolset you boot into.
To make a rescue ISO available, add it as a custom image. Once added, it appears on the Images and Media page and can be selected in the rescue dialog. See Available Images for supported formats and how to request a new image.
Rescue Mode can also be driven through the API. See Virtual Machine Endpoints → for the rescue endpoints.
Next Steps
- Console Access — connect to the rescue environment
- Manage VMs — power, upgrade, and lifecycle actions
- Images and Media — browse available images and ISOs
.png)