Create a GPU VM
Deploy a GPU-accelerated virtual machine by selecting a GPU series, GPU count, and data center. GPU VMs come with pre-installed NVIDIA drivers and an auto-assigned public IP.
Prerequisites
- The Tenant Administrator or Tenant Power User role
- GPU access enabled on your account — contact support if you don't see the GPU section in the sidebar
- At least one SSH key in your SSH Keys library — GPU VMs require SSH key authentication
GPU Series
GPU VMs are organized by series, where each series represents a specific NVIDIA GPU model family. Choose a series based on your workload:
| Series | Best for |
|---|---|
| RTX A6000 Series | AI-assisted creative workflows, rendering, visualization, and general AI experimentation. Balances compute power with professional graphics capabilities. |
| RTX PRO 6000 Blackwell Series | The most demanding generative AI and visualization workloads. Enhanced AI acceleration, massive memory capacity, and advanced ray tracing. |
| A100 Series | Production AI training and inference. Proven price-to-performance with multi-instance GPU partitioning and strong memory bandwidth for large models. |
| H100 Series | Large language models, transformer model training, and inference at scale. Latest-generation tensor cores and large memory capacity for demanding, high-performance AI workloads. |
| H200 Series | The largest language models and the most memory-intensive training and inference. Expanded high-bandwidth memory keeps bigger models resident in GPU memory for frontier-scale AI workloads. |
Within each series, you choose how many GPUs you need: 1, 2, 4, or 8.
Create the VM
Navigate to GPU in the sidebar and click Create GPU VM to open the creation form.
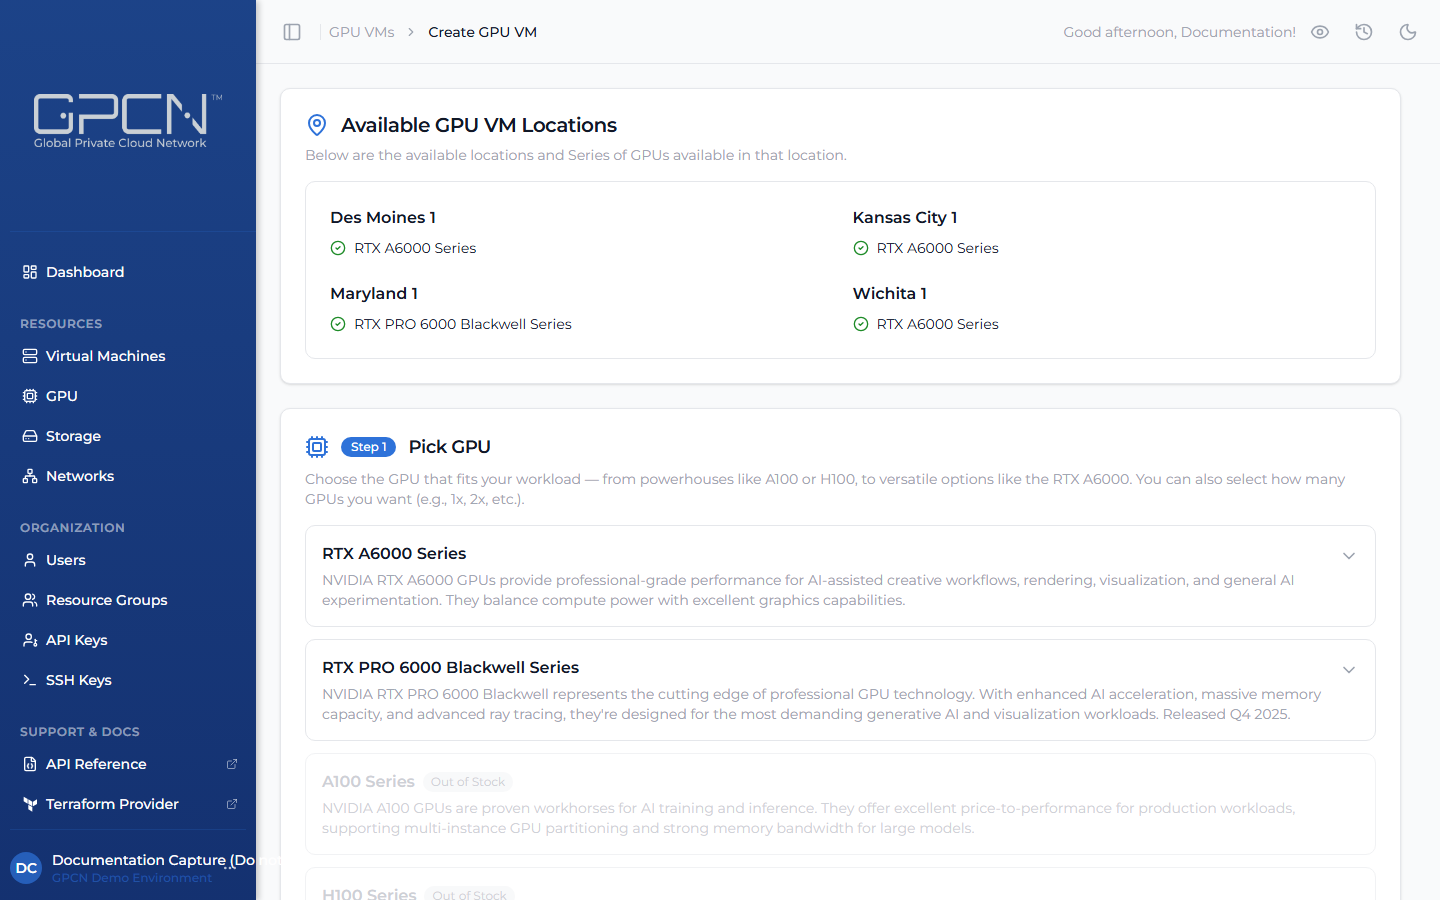
GPU availability changes in real time. The creation form shows current inventory for each series and data center combination — only locations with available inventory are selectable.
Step 1 — Select a GPU Series
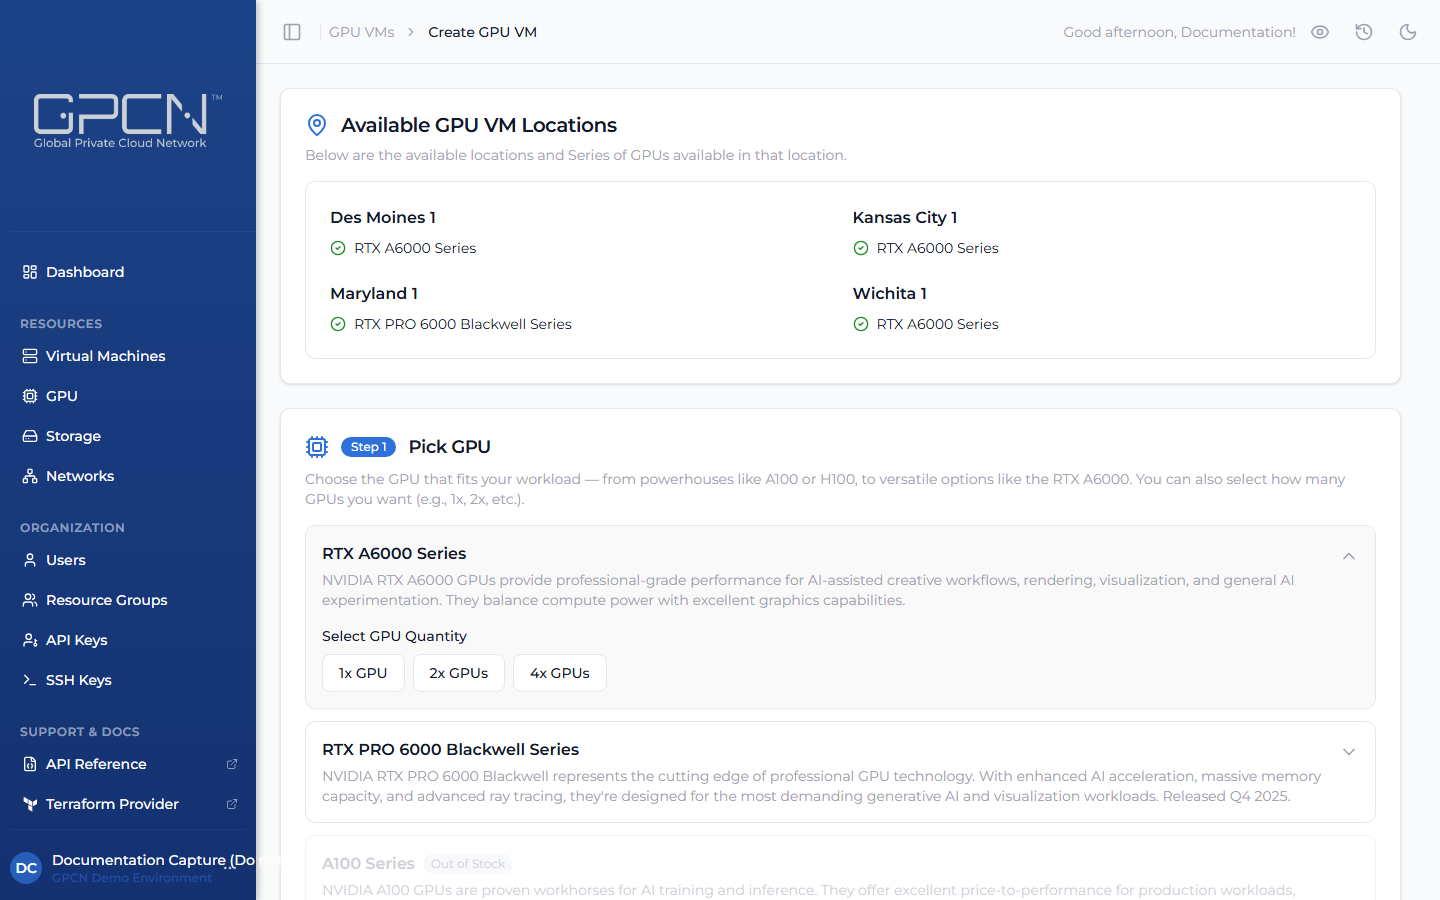
Click a series card to expand it and reveal the available GPU count options. Choose the series that fits your workload (see the table above), then select your GPU count — 1, 2, 4, or 8 GPUs.

Series cards show the GPU model and a short description. Out-of-stock series are dimmed and not selectable.
Step 2 — Select a Deployment Location
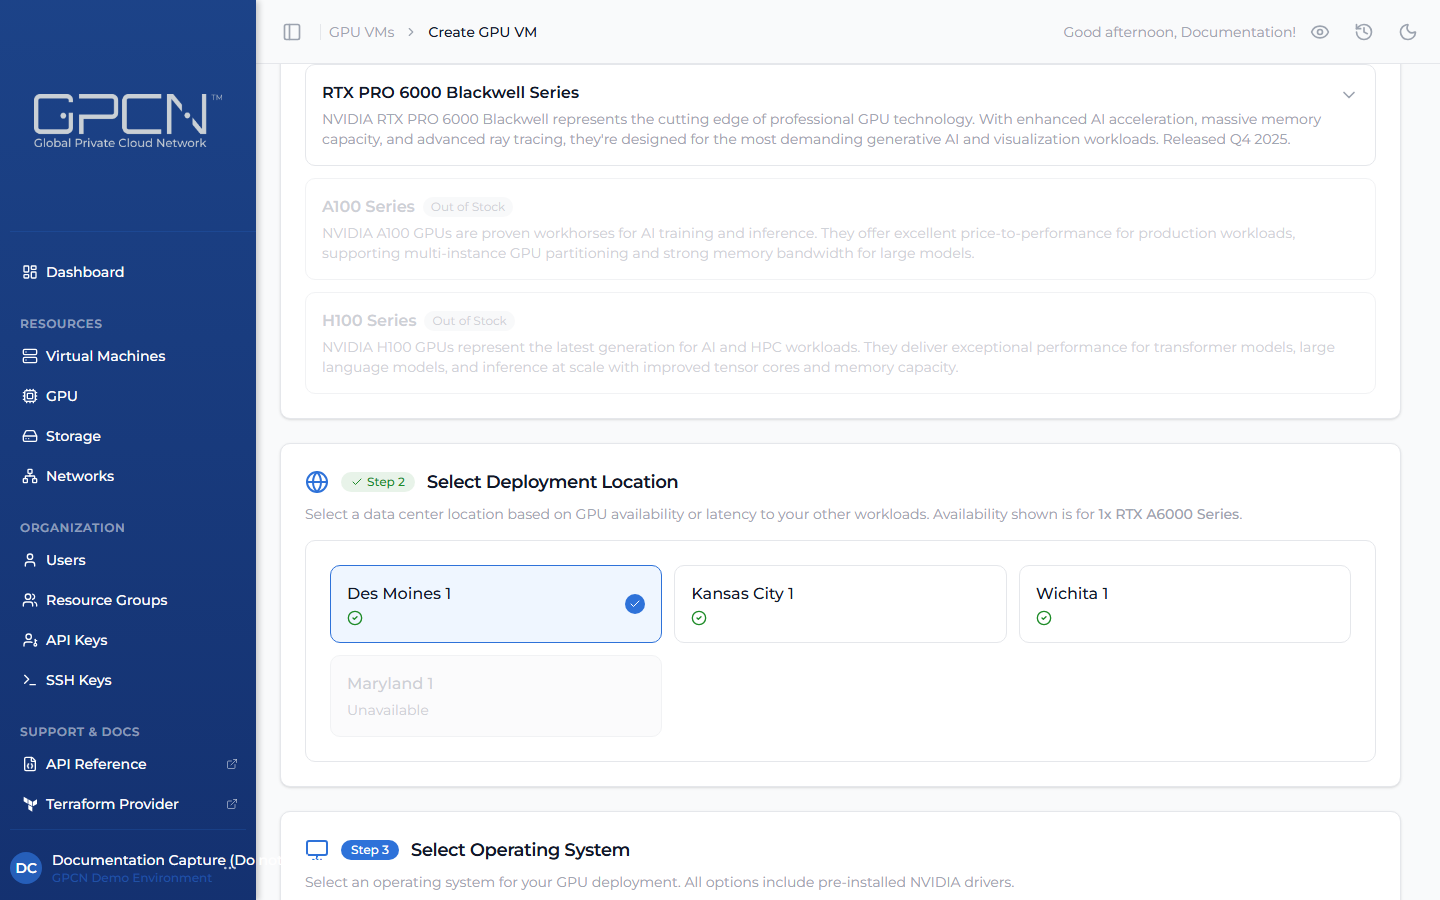
Choose the data center where your GPU VM will be deployed. Only locations with available inventory for your selected series and count are shown. Click a location card to select it.
Step 3 — Select an Operating System
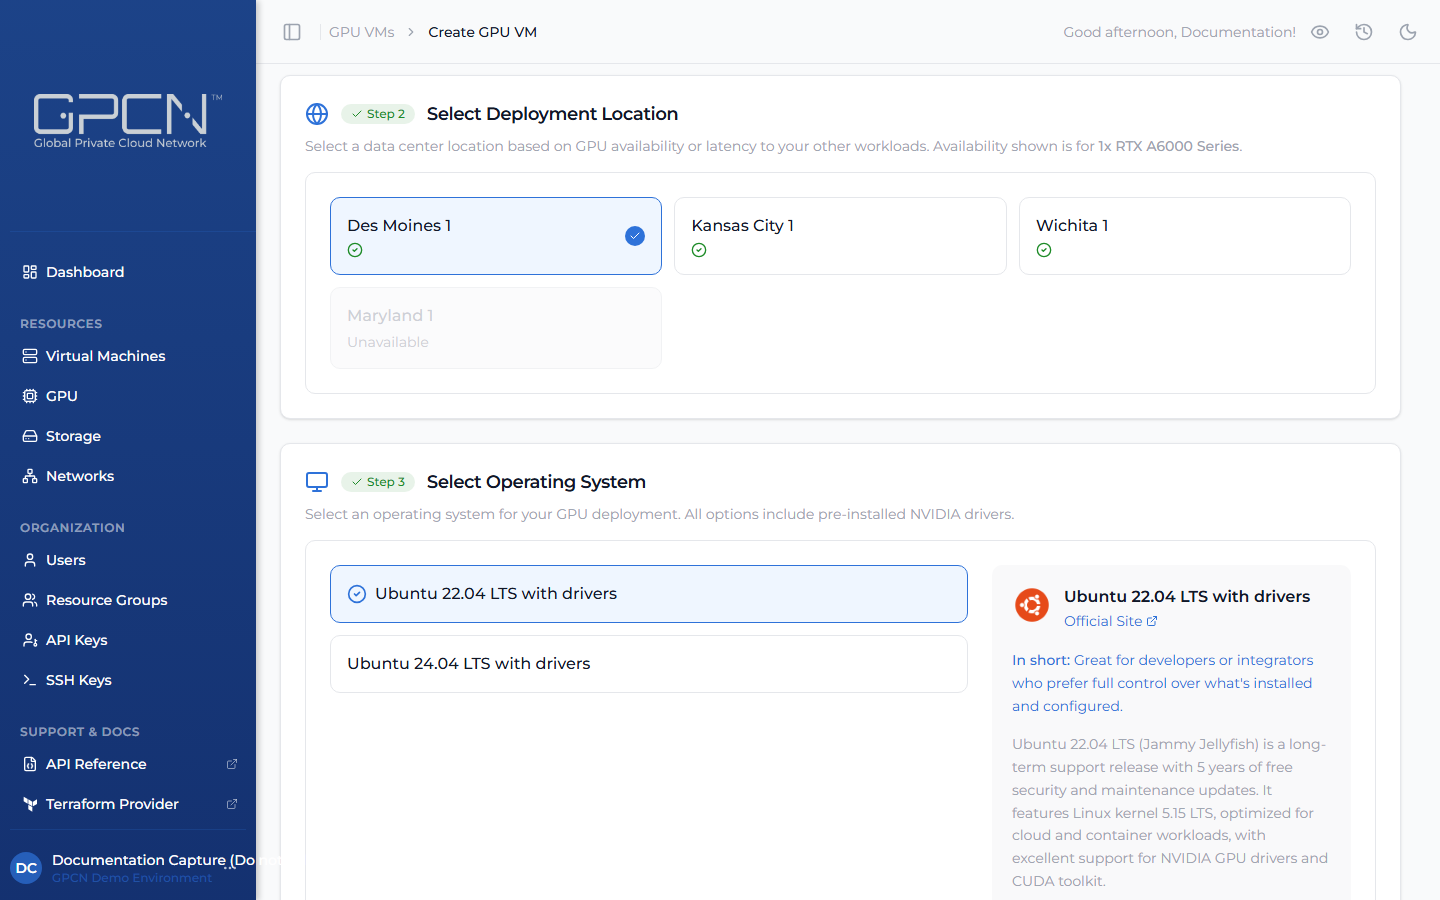
Choose the operating system for your GPU VM.
Step 4 — Authentication
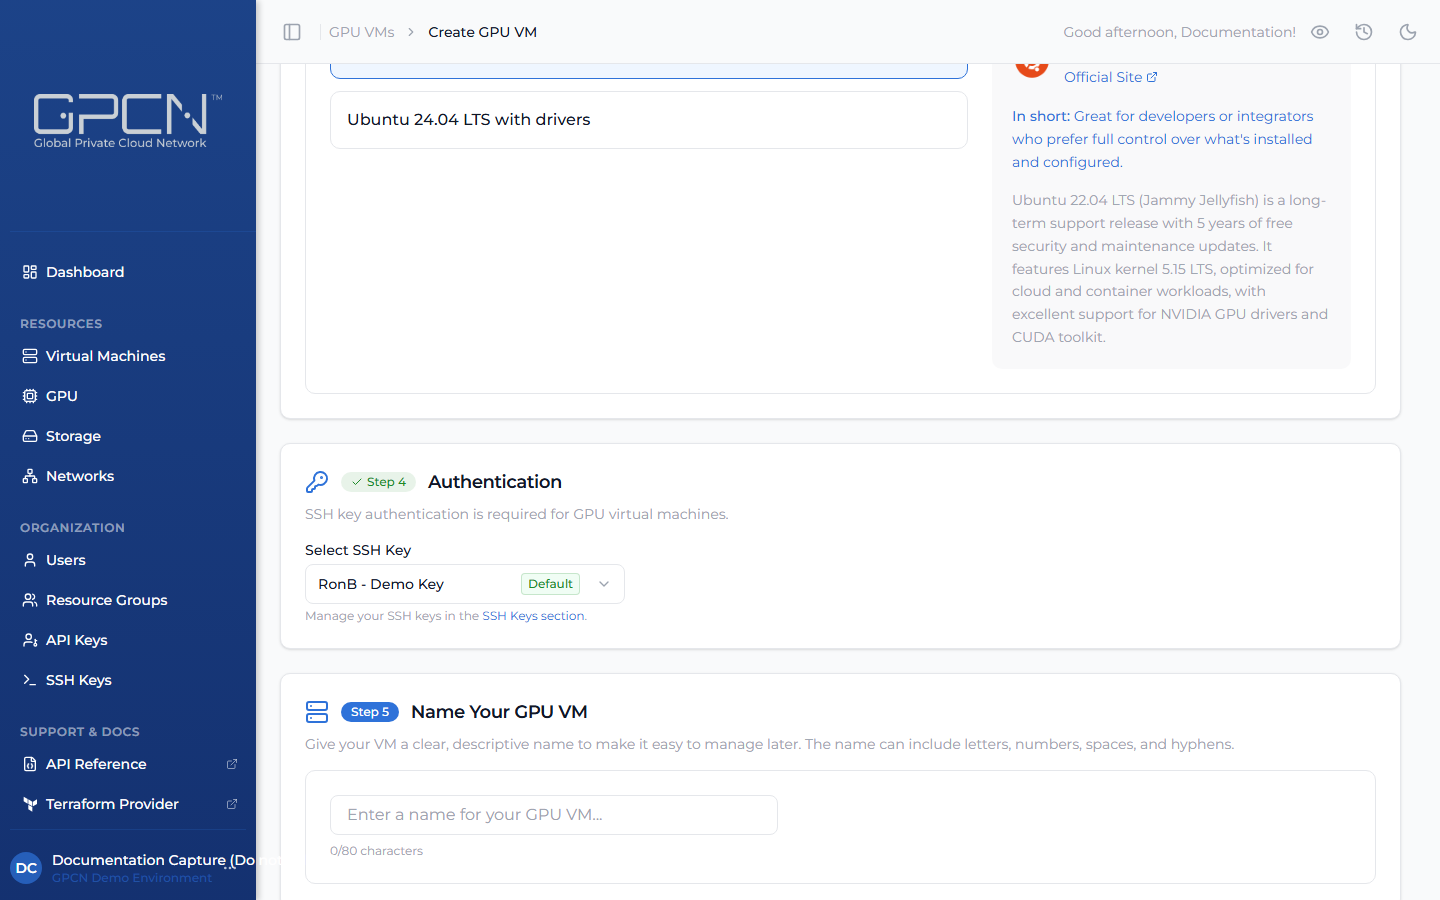
Select an SSH key from your library to use for this VM. GPU VMs require SSH key authentication — password access is not available.
If you have a default key set, it's pre-selected automatically. Use the dropdown to choose a different key.
If you don't have an SSH key yet, add one at SSH Keys before continuing. You'll need the corresponding private key to connect after the VM is deployed.
Step 5 — Name Your VM
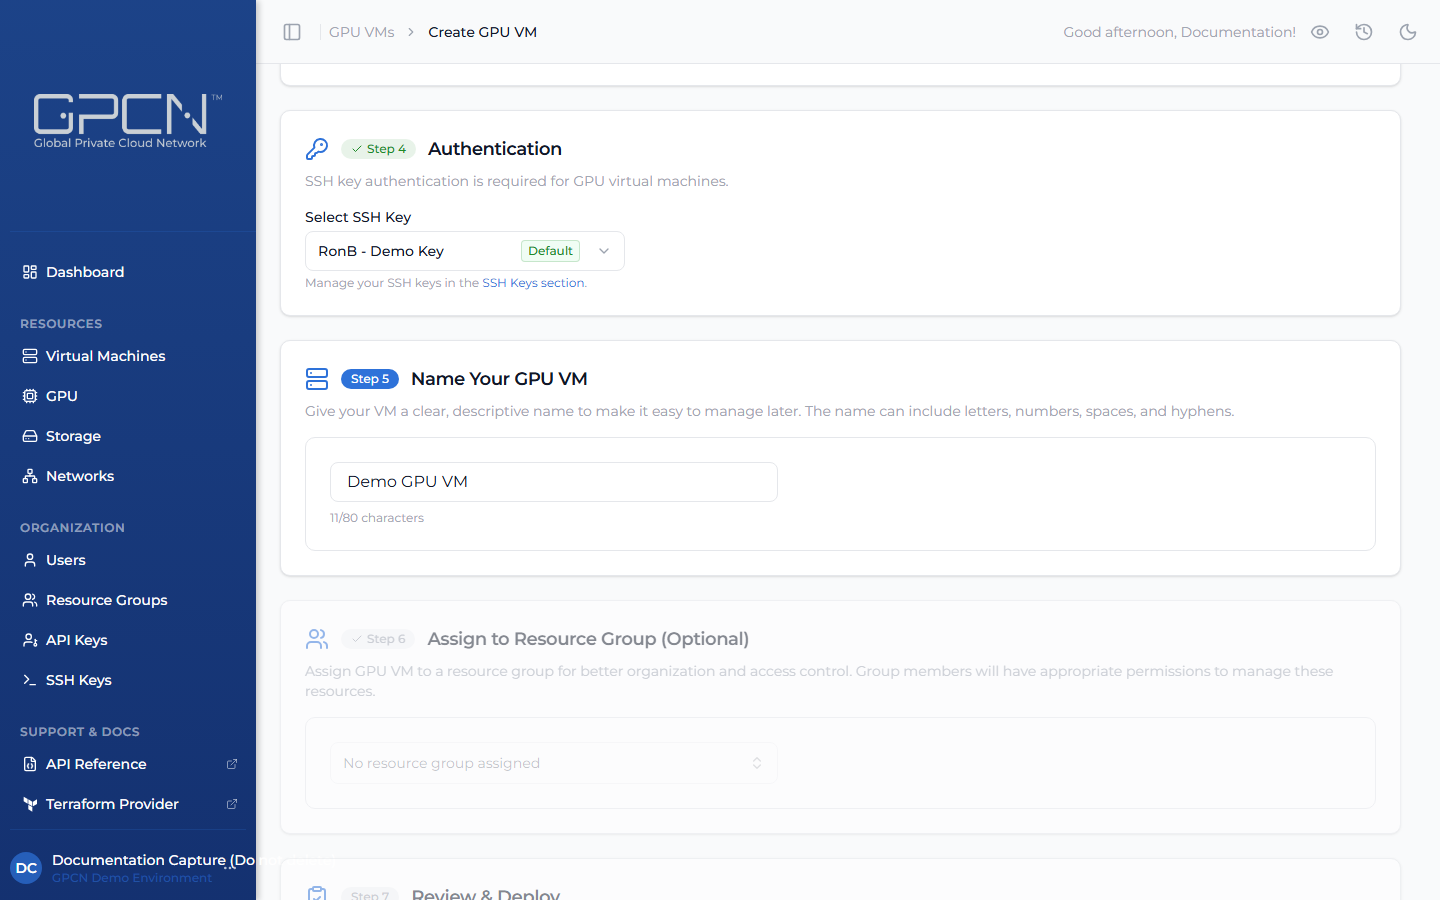
Enter a unique name for your GPU VM.
Step 6 — Assign to a Resource Group (Optional)

Optionally assign the VM to a resource group for organization and access control. Leave this as the default to skip resource group assignment.
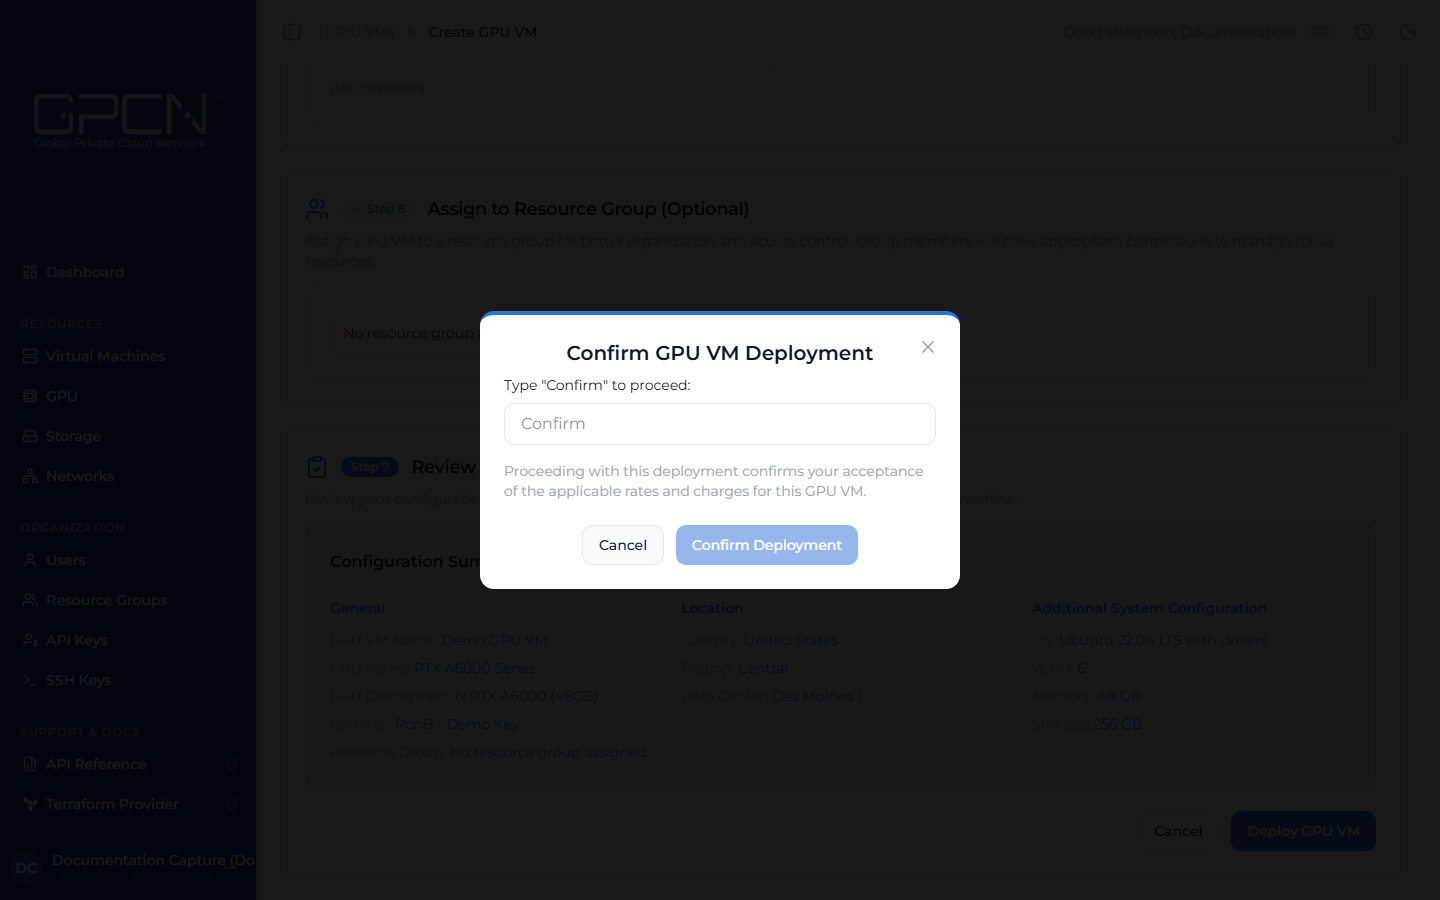
Step 7 — Deploy
Review your configuration summary, then click Deploy GPU VM. A confirmation dialog will appear — review the details and confirm to start provisioning.
Supported Operating Systems
GPU VMs support Ubuntu 22.04 LTS and Ubuntu 24.04 LTS. Both images come pre-installed with NVIDIA drivers, making them ready for GPU workloads immediately after deployment. Ubuntu is the most widely used OS for GPU computing, machine learning frameworks, and AI toolchains, which is why these are the supported options.
If you require a different operating system, contact support and we can discuss options for your environment.
Next Steps
- Manage GPU VMs — start, stop, delete, and manage SSH key access
- SSH Keys — add and manage the keys used for GPU VM authentication
.png)