Manage Users
Users are individuals who have access to your organization's GPCN™ account. From this page, you can invite new users, assign roles and resource groups, update user information, and remove users.
Prerequisites
- The Tenant Administrator or Tenant Power User role
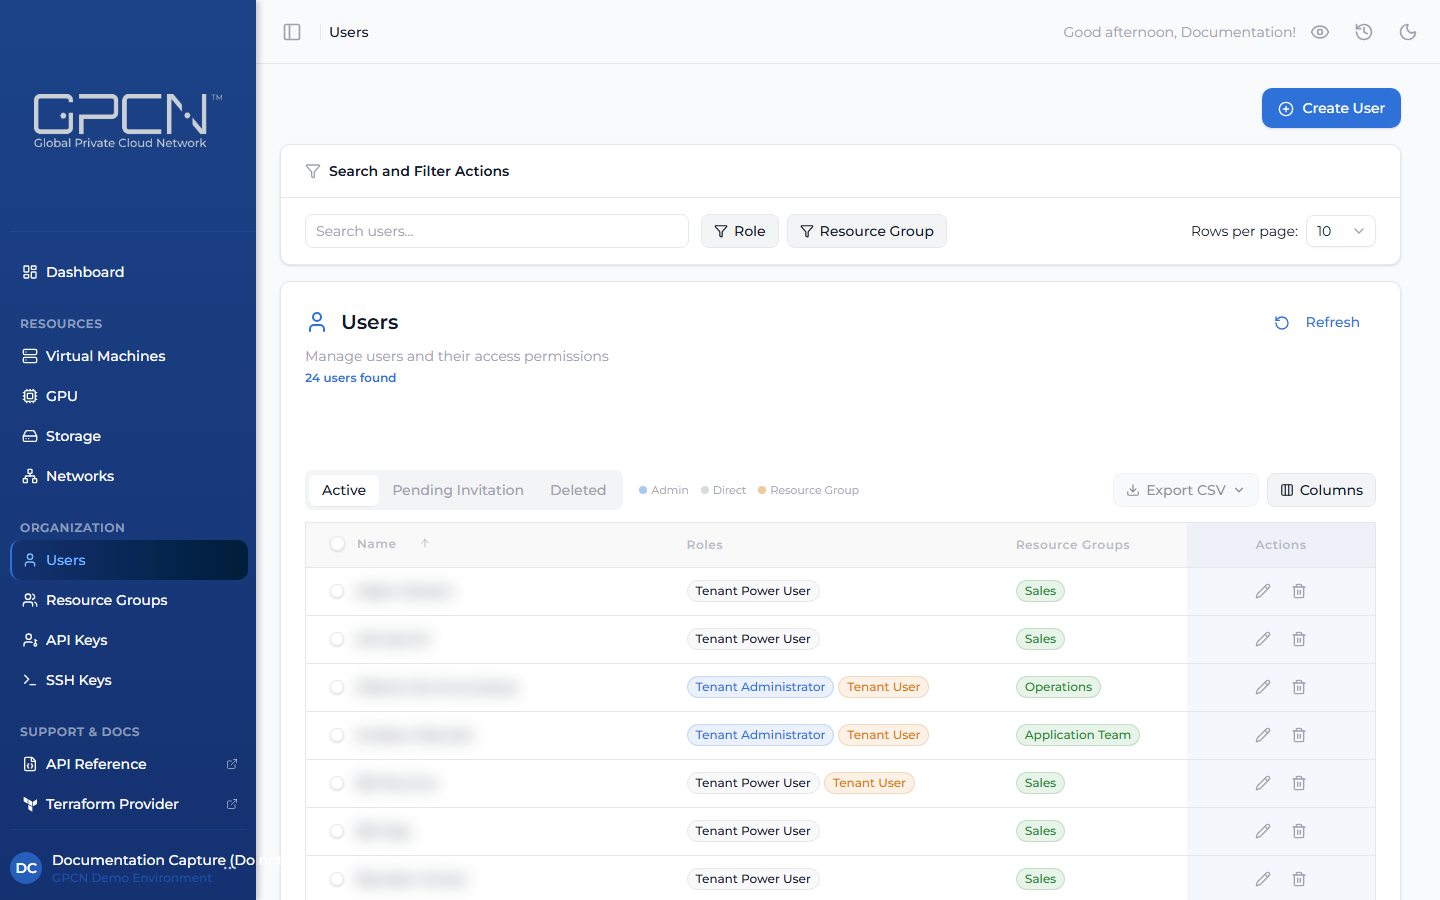
The Users page is organized into three tabs:
| Tab | What it shows |
|---|---|
| Active | Users with fully activated accounts who can sign in to the portal |
| Pending Invitation | Users who have been sent an invitation but haven't completed account activation yet |
| Deleted | Users who have been removed from your organization |
Invite a User

New users join through an email invitation. When you send an invite, the user receives an email with an activation link to set their password and access the portal.
- Navigate to Users in the sidebar and click Invite User.
- Enter the user's email address.
- (Optional) Enter their first and last name — this lets them skip name entry when activating their account.
- Select the resource groups to add the user to.
- Select one or more roles to assign. At least one role is required.
- Click Send Invite Email.
Invite Status
| Status | Description |
|---|---|
| Pending | Invitation sent, user hasn't activated yet |
| Activated | User has set their password and can sign in |
| Expired | Invitation link has lapsed — resend to generate a new one |
Resend an Invitation
If an invitation expires or a user didn't receive it, find the user in the Pending Invitation tab and click the resend icon on their row, or open their detail page and click Resend Invite.
Assign and Revoke Roles
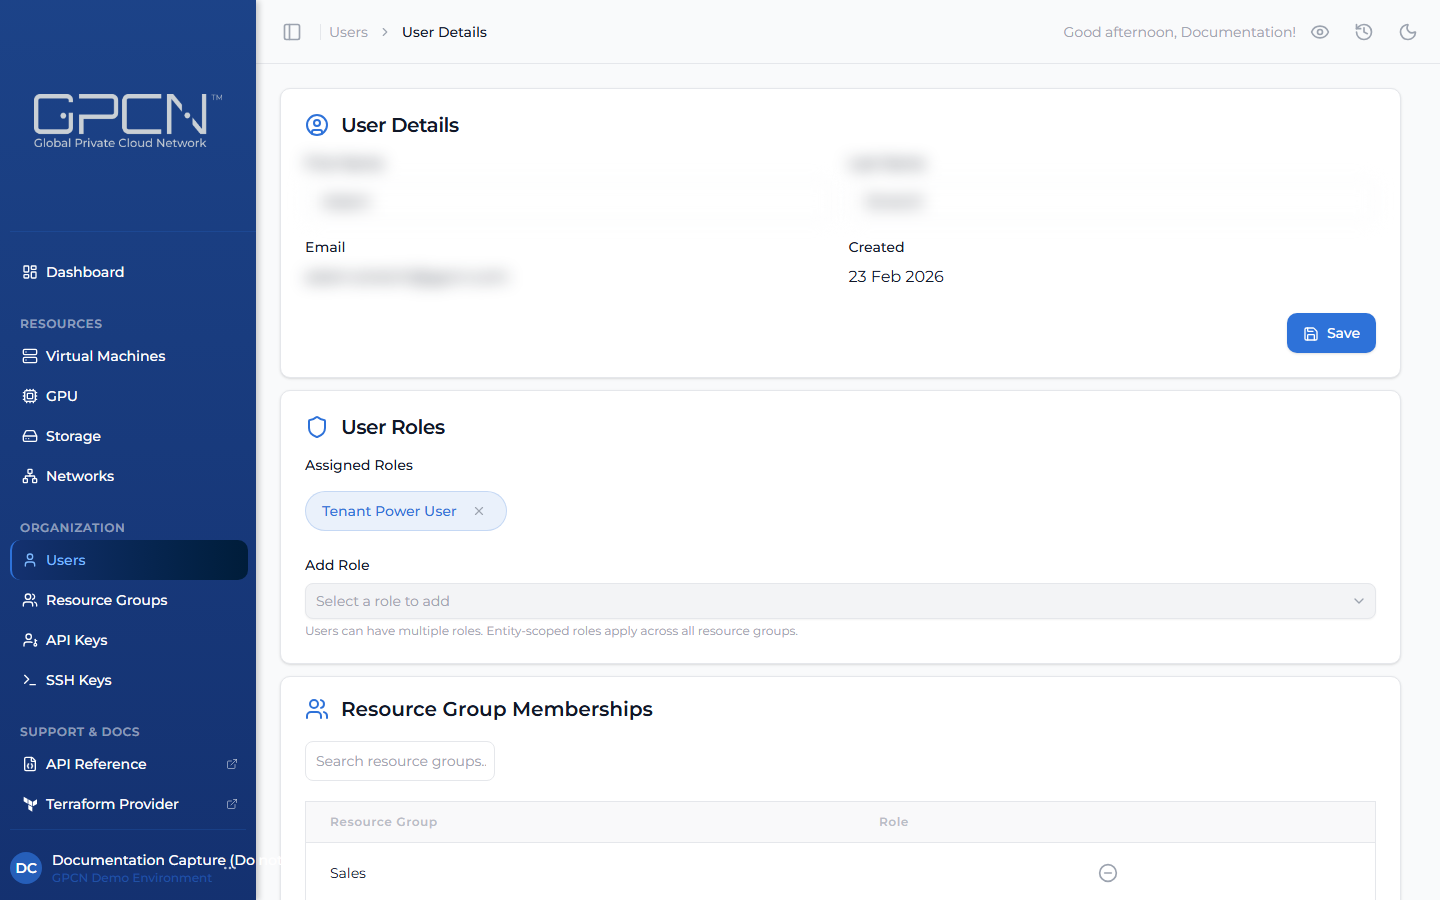
Roles control what a user can do in the portal. You can update role assignments from a user's detail page at any time.
To assign a role: Open the user's detail page, find the User Roles section, and select a role from the Add Role dropdown. You can only assign roles at or below your own level.
To revoke a role: Click the X on the role badge. Users must always have at least one role — the last role cannot be removed.
Role Origin
The Users list shows each user's roles as badges in the Roles column. Roles are displayed in two styles:
- Direct roles — assigned at the tenant level. These appear as standard role badges and apply across your entire organization.
- Resource group roles — assigned through a resource group. These appear with an amber highlight to distinguish them from direct roles. Hovering over the badge shows the resource group the role is scoped to.
A user may have a mix of both. If a user has more roles than fit in the column, a +N overflow count appears — hover over it to see the remaining roles grouped by type and resource group.
Edit User Details
To update a user's name, open their detail page, update the First Name or Last Name fields, and click Save. Email addresses are not editable after an account is created. If a user's email address needs to change, delete the existing account and invite them again with their new email address.
Delete a User
Deleting a user permanently removes their account and revokes all access. This action cannot be undone.
To delete a user, click the delete icon (trash) on their row in the Users list, or open their detail page and click Delete User in the Danger Zone section. You will be asked to confirm before the deletion is processed.
Deleting a user is permanent. If you need to temporarily remove someone's access, consider revoking their roles instead — their account can be reinvited later if needed.
Export Users
Click Export CSV from the Users list to download user data. The button opens a dropdown with two options:
- Current Tab — exports only the users on the active tab (Active, Pending Invitation, or Deleted), with columns tailored to that tab. Pending users include invite status and expiry date; deleted users include the deletion date.
- All Users — exports active, pending, and deleted users together in a single file with all columns.
Both options fetch every matching user, not just the current page, so the export is always complete regardless of how many users you have.
Tips for Administrators
- Assign roles carefully at invite time — it's easier to start with least-privilege and expand access than to clean up overly broad permissions later
- Review role assignments periodically — confirm that each user's access still reflects their current responsibilities
- Remove users promptly when they leave — delete their account as soon as they no longer need access to your organization
Next Steps
- Manage Resource Groups — organize users into resource groups
- Roles & Permissions — understand the full role and permissions model
- User API Reference → — manage users programmatically
.png)